Older-Unit Care · Salt
Salt Air and the Condenser: Clearing It Without Damaging the Fins
On a Bainbridge shoreline the air that cools a Sub-Zero's condenser carries salt, and wet salt is what aluminium fins corrode in.
- Written by
- Bjorn Aaltonen
- Trade
- Refrigeration technician, 15 yrs
- Holds
- EPA 608 certified
- Dated
What the salt does to a condenser
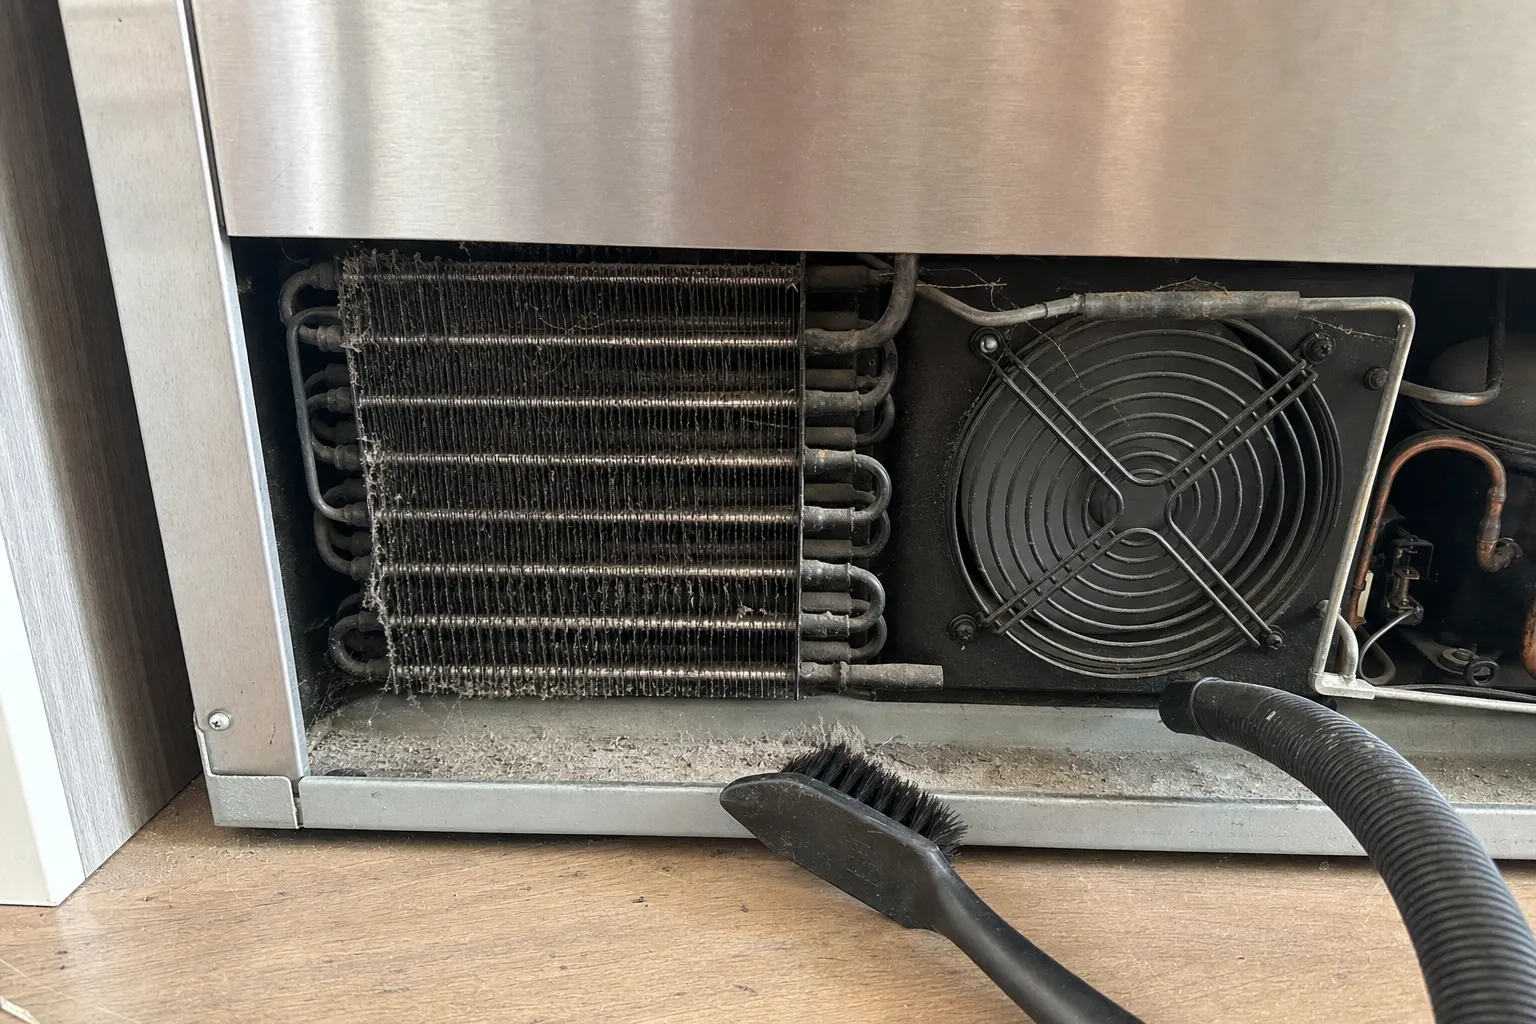
The condenser is where the heat taken out of the food leaves the machine. A fan draws room air in through the grille, pushes it across a coil of tube and thin aluminium fins, and sends it back out warmer. Sub-Zero’s own guides warn owners not to bend those fins, because the gaps between them are the whole point.
Dust clogs the gaps. Salt does something slower. Sea air leaves a fine film of salt on the fins, the damp nights wet it, and aluminium sitting in wet chloride is exactly the condition it pits in. A pitted fin still looks like a fin until a stiff brush or a thumb goes through it. That is why the procedure below is gentler than the one most people reach for.
The two places the coil can be
Where you look depends on the unit. On a Sub-Zero built-in, the tall kind with the grille across the top, the condenser sits behind that top grille. On an integrated column or an undercounter drawer it sits low, behind the kickplate. The drawing above shows both. The procedure is the same once the cover is off; only the reach is different, and the top grille on a built-in usually needs a step stool.
A house on the waterline, or one with a dog, earns the short end of whatever interval your own use and care guide gives. The point of the shoreline is not a different number; it is that what settles on the fins here does not brush off as cleanly.
When brushing is the wrong answer
If the flashlight shows a coil that is mostly corroded rather than mostly dusty, brushing it harder will not bring it back. A condenser is part of the sealed refrigeration system, so replacing one means recovering the refrigerant and brazing, which is not owner work. The honest move is to put the grille back, run the unit, and book a look before a hot afternoon finds the weak spot for you.
The procedure, step by step
- You will want
- Soft-bristle brush · Vacuum with a hose and crevice tool · Work gloves · Flashlight
- And to hand
- An old towel for the floor
-
Switch the unit off before you touch anything
On a Classic built-in, a 600-series unit or an integrated column, turn it off at the control panel. The older 500-series guide asks for the circuit breaker instead. Put the gloves on now: the condenser fins are thin and sharp enough to cut.
-
Take the grille or kickplate off
A Classic grille flips up: pull out on its bottom edge and rotate it upward. A 600-series louvred grille has screws along its bottom, reached with the doors open; tilt it forward at the top and lift it off its springs. An integrated unit's kickplate comes off with two screws. If a screw will not turn, stop there rather than forcing it.
-
Look at the fin face before you brush it
Lay the towel down and shine the flashlight across the coil, not straight at it. Grey fluff is dust and comes away. A chalky white film on the fins, or fins that look chewed along the front edge, is corrosion; leave that area alone and note where it is.
-
Brush along the fins, never across them
Work the soft brush in the direction the fins run, up and down on the models the manufacturer describes, with the vacuum nozzle following the brush. Across the fins, the bristles fold them flat and close the gaps the air has to pass through.
-
Clear the compartment floor and the grille itself
Vacuum the floor of the compartment and the back of the grille louvres. Salty dust left on the grille goes straight back onto the coil the first time the fan runs.
-
Leave the water and the sprays out of it
No hose, no foaming coil cleaner, no pressure washer. The manufacturer's method is a brush and a vacuum, and the compartment around the coil is full of wiring and the controls.
-
Refit, switch on, and watch the indicator
Put the grille or kickplate back, switch the unit on at the panel or the breaker, and note whether any service or condenser light that was showing goes out. If it stays on after a clean coil, that is the unit asking for a technician.
That is where an owner stops. Past this point the work means panels off, live wiring or the sealed system, and it is ours: Driftwood Appliance Service, (206) 785-2960.